
I can't believe that's me! I can't believe I did that! There I am surrounded by the Wasatch Mountains and all that famous Utah powder. What a trip!


The L.A. Times had a front page article last Saturday about a proposed California law that would make it mandatory to buy compact fluorescent light bulbs to replace old incandescent bulbs beginning in 2012. The purpose of the new legislation, authored by Assemblyman Lloyd Levine, is to save energy. They compute that the difference in energy costs per year between the incandescent bulb ($9.20) and the CF bulb ($2.50) justifies the switch. If everyone used these new low-energy, long-lasting bulbs, electricity consumption would be slashed by 75% according to the article.
All of this sounds very good but nowhere in the article did it mention the one aspect of artificial lighting that matters most to me, i.e., whether or not the bulbs provide full-spectrum lighting. Until now, I had thought that fluorescent lighting was very bad for your eyes and that you could not get full-spectrum light or "natural light" from a fluorescent tube. I was wrong.
Let me explain what full-spectrum lighting is. The sun provides light in a fairly even distribution over the visible spectrum of electromagnetic waves. This is the light that our eyes evolved to see. We were not meant to spend our lives inside a dark cave (modern office building) coming out only for small periods of sun, or staying awake for very long past sunset. Of course, the sun's spectrum changes with location, the seasons, and time of day, and our eyes were also meant to soak up the sun's rays at various times throughout the day. Sunlight also provides a small amount of mid- and near-UV light.
The best artificial lighting would try to imitate what the sun can do for us. Full spectrum lighting is better not only for our eyes but for our general health as well. How can you tell if you are getting full-spectrum lighting? There are two numbers that will indicate the color temperature and the color rendering of any light source. The Correlated Color Temperature (CCT) is a measure of a light source's apparent "whiteness," yellowness (warmth), or blueness (coolness). This number is given in degrees Kelvin (K). If you use a good camera, you have probably encountered this number already. A flash will give you a cooler, daylight exposure than without flash in low light. Indoor photos taken under incandescent light will be very yellow. In the old days, there were different kinds of film you could use to counteract this. The sun's CCT can vary from 3600K (warm/yellow), to 4870K at noon, to 7100K on an overcast day, or to 25,000K (very cool/blue) in the Northwest sky. 5500K is considered "white" light from the sun.
The Color Rendering Index (CRI) indicates how well the colors of objects are rendered (reflected), using a light source at a specific CCT. Sunlight has a perfect CRI rating of 100. Note that this number cannot be compared with different sources that have different CCT ratings. An incandescent bulb may have a high CRI rating of 95 but still appear yellow because it's CCT is only 2700K. But generally, a light with a CCT of 5000K and a CRI of 80-89 will give excellent color rendering. To qualify as a "full-Spectrum" light, a bulb or fluorescent tube must have a CCT of 5000 to 7500K and a CRI of 90 to 100. Whether or not the artificial light also includes the proper ratio of mid- and near-UV light is another issue and a very thorny one.
OK, now try and find these numbers on the box of bulbs you are considering buying. It's not easy. Phillips assumes you are not interested in these technical details or couldn't understand what they mean if they gave them to you. GE offers a glossary of terms that does explain all this very nicely, but when you go to buy a particular bulb, you can't get the specifics. After much searching on the web, I found a few companies that will give you the full details and this is when I found that you can indeed purchase compact fluorescent bulbs that fit the definition of full-spectrum lighting. These bulbs are very costly, ranging from $10 to $50 for a simple 75W equivalent bulb. They are not available at your local Home Depot, at least not at mine, you must buy them over the Internet adding shipping costs to the total. If you are interested, you can get lots of info and the names of brands to consider from the Bates Method website store.
One major drawback to these fluorescent bulbs is that they contain mercury, although not very much. To dispose of them properly, they should be taken to a hazardous waste site (which I am not sure really solves the problem. It only pushes it on to someone else). And these bulbs don't fit some sockets and cannot be used with a dimmer switch. Currently, I have several lights with full-spectrum bulbs made with neodymium oxide, a rare earth element. These bulbs contain krypton gas and a chrome plated brass base that give them an earth-friendly life of over 3,500 hours. I am very satisfied with the results but may consider the CFLs when they need to be replaced.
But I still wonder if it is good to have the equivalent of noonday sunlight at 10:00 p.m. And what about UV light which is also important for our health? Most fluorescent bulbs have coatings to absorb the UV rays and many health experts think that this is good. But again, we were meant to soak up the UV rays all day long, too. And nature has ways of making sure we do not get too much of a good thing. (See Dr. Michael Eades's blog for Feb. 16, 2007 on the subject of Folate and Fun in the Sun.)
All in all, I think the best solution may be to insist on buildings with windows or skylights and at night to turn off the lights and go to bed early.


 The Foulard that I made with the yarn that I dyed is finished. I really like the way that it came out. First I soaked the finished foulard in warmish water with a little bit of Eucalan. This photo shows the wet foulard before blocking. I like the swirls and curls. Then I used my new blocking wires to stretch it out to a 40-inch square on two old mattress pads on the floor as there was no other place big enough for me to lay it flat. I pinned the wires to the pads and left the whole thing overnight, hoping I wouldn't forget it was there and walk on it in the middle of the night to get a drink of water or something.
 Next morning, it was dry and ready for use. The yarn is so soft. The foulard can be worn many ways, but the easiest thing to do is fold it into a triangle and drape it over the shoulders. I tried to get a picture of this, but no luck. So here it is draped over a hanger. I think you can get the idea.
Now to finish the baby sweater. It's coming along fine. I am up to the armholes. I hope to have photos soon.


 No earth, no sky, can be discerned at all,
 Snow has obliterated all from sight:


The baby,open-mouthed, beholds a chase
Of falling cherry-petals: Buddha's face.
-- Kubutsu

Draw in your heart from vain adventurings;
Float slowly, swimmer, slowly drawing breath.
See, in this wild green foam of growing things
The heavy hyacinth remembering death.
-- L.A. MacKay
 The original plan I had for the yarn I dyed (Fiber Fun, Part 1 and Part 2) was to make all three hanks into a shawl. When I made a swatch in the shawl pattern on size 8 needles, I could see right away that it was just not going to work. The bright colors which tended to look stripey just obliterated the stitch design of the shawl. And the yarn wasn't being shown off to its best advantage either. It's a triangular shawl that flares out from the center and I had thought that having the stripes go in different directions would be interesting. But the colors are too bright. It's too busy. Ixnay on this one.
 I can't show you a swatch of that idea yet as I have to go out and get the second yarn, but here is a swatch of the yarn I dyed using size 5 needles. Notice how I got perfect stripes this time (for awhile anyway). This was because my row length was exactly right for the length of chartreuse in my dyed yarn. Some people try to get this effect on purpose. They stretch out the hanks of yarn to be dyed up and down and around, and then dye it with long color repeats. Problem is, as soon as you have an increase or a decrease in your pattern, you lose your stripes.
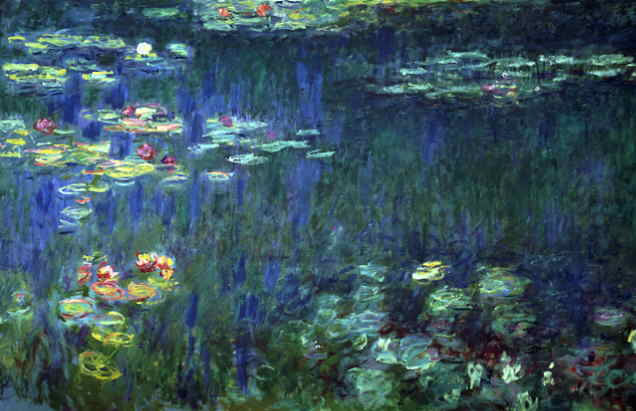
 A foulard. The perfect pattern for my yarn. It is from the Morehouse Farm knitting book. The pattern is as simple as can be, garter stitch all the way, but you start at a corner and increase one stitch with each row. When you get to the middle, you start to decrease with each row. So except for the two rows in the middle, no two rows will be of the same length, and the variegated yarn doesn't have a chance to get into a stripey mode. This swatch was done with size 13 needles though the pattern calls for 11s. I wanted a more open effect. The stitches are pretty even right now, but when I block it I will purposely stretch them out to different sizes to make the final square look more casual and carefree. Looks Impressionistic doesn't it? Reminds me of Monet's Water Lilies. Worn as a shawl, it will be perfect for those cool summer evenings we have in L.A.
 Wow! Was I surprised to see how rich and vibrant the colors got after zapping the sausages in the microwave. The blue which had been a sickly pale blue was now a bright royal blue, the lilac (?) a royal purple, and a neon sign could not be as bright as the chartreuse. But would the yarn keep the color or would it wash out in the rinse?
 I had not sealed the ends of the wrap, as was suggested, because I thought the steam should be allowed to escape and I didn't want the sausages to explode. The result was that some of the dye water, not much, leaked out into the tub. Perhaps next time I'll put a cloth or paper towel under the coils. I think I will also turn the coils over as well as turning them around once or twice. The lid helped to keep the steam in the tub and I let the tub cool in the oven for several hours before unwrapping them. (Actually, I had to teach a few lessons.) The lid also helped to keep the smell of hot wet wool down to a minimum. And that was it! Very easy indeed.

Next installment: swatches.

 It took two trips to the store to get supplies: plastic tubs, plastic wrap, paper towels, rubber gloves, a mask, hooks to hang the wet yarn up to dry, and I still hadn't made up my mind exactly which method I was going to use and I didn't decide until the last moment. I also bought some plastic condiment bottles for mixing the dyes. When you put the powdered dye into the bottle there is only a small opening for any of the dust to escape. Breathing the powder is what is dangerous about these dyes. I was then able to squirt the colors onto the yarn exactly where I wanted them to go.
  Microwave zapping only takes a few minutes, but the preparation time can be quite long as any cook knows. First I spread out some newspapers on the counter and on top of that overlapping thicknesses of the plastic wrap. I had soaked the yarn overnight in cold water with a little dishwashing liquid to make sure it was thoroughly wet. Donning my mask (in chem class we were constantly being reminded to put on our goggles), I mixed the dye solution in the plastic bottles. First 1/2 teaspoon of the dye, then 1/4 cup of vinegar, and finally 1/2 cup of water went into the condiment bottles, and holding my gloved hand over the tip, I shook it all up until the powder was completely dissolved. I decided to use only the three colors straight from the jar with no mixing.
  After squeezing the water out of the yarn gently with my hands, I spread the hanks out on the plastic wrap and started to squirt. Variegated yarn can present problems when knitting because depending on the length of your row and the length of the color on the yarn, you get stripes, mottled colors, blotches of color, or weird moiré patterns. I had discovered this unfortunate fact when I made the leg warmers. Keeping things simple, I decided to have medium length color strips and I wanted blue to be the mediator between the lilac and the chartreuse. I didn't know how much the colors would run together and while blue and green mix together well, and blue and purple also, I wasn't sure what I would get with lilac and chartreuse.
  So I squirted the ends with the lilac and chartreuse, and put the blue in the middle. This would also make the purple and chartreuse longer color lengths and the blue shorter, but the blue would come more often. I was trying to get some randomness in the colors while still having the three hanks very similar if I wanted to knit them all into one project. After taking this picture, I squirted on more dye until the blue and lilac were gone and only a little of the chartreuse was left. I then massaged the colors into the yarn to spread it more evenly and close the gap between colors. I didn't want any white in my final product. One spot that might not get enough dye is at the ends of the hanks where they are tied together, so I gave these spots an extra squirt.
 It was only after I had painted the yarn that I decided to use the sausage method to microwave them. I didn't want the two ends touching each other. So I wrapped each hank in two layers of plastic wrap like sausages and coiled them up. This had the added benefit that I would only need one pan or plastic tub to cook them in instead of three separate tubs. That would have taken a lot longer and might not guarantee consistent results.